Hello, thank you for stopping by and allowing me to inspire you to get creative! Today I would like to share with you how embossing vellum can give you a beautiful effect, full of texture. I created this card for the Global Design Project #GDP370. This week we have a card sketch and as I have said in a previous post, I love a sketch challenge.

Not only is my card based on the sketch above, but it is also inspired by a card created by Mikaela Titheridge – The Crafty oINK Pen. Using the smaller, accent stamps and dies from a set. The Charming Sentiments stamp set and dies bundle, has a number of these that can be used for a variety of projects. I have used a selection of the dies as decorations on my wreath.
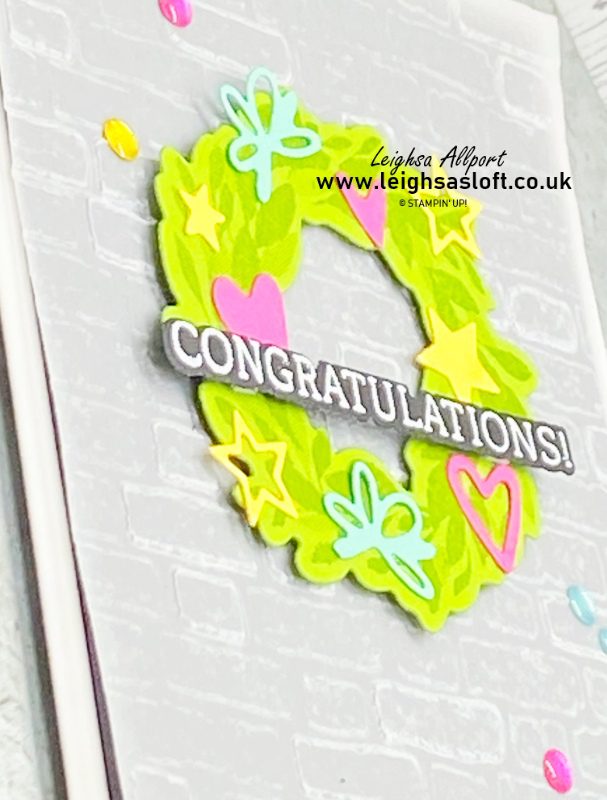
Embossing Vellum for a Congratulations Card
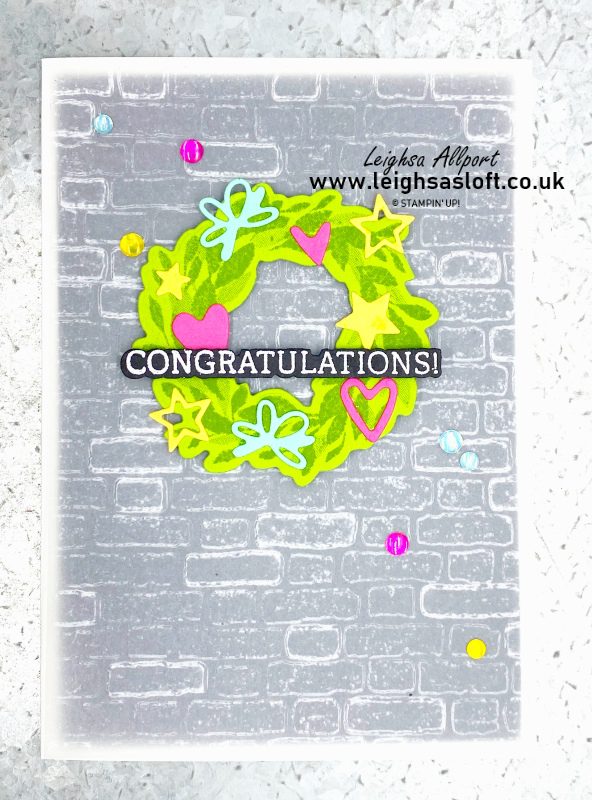
Cut a piece of Vellum cardstock to 10cm x 14.4cm and place into the Brick & Mortar 3D Embossing Folder, ensuring the bricks run the correct way. Run through the Stampin’ Cut & Emboss Machine, with the correct plates. Embossing Vellum gives both beautiful depth and texture.
Stamp the wreath, from the Cottage Wreaths stamp set, onto Granny Apple Green cardstock, using Granny Apple Green ink. This gives a beautiful tone on tone with no white border when die-cut with the coordinating die. Adhere to your embossed vellum with Stampin’ Dimensionals. Using Multipurpose Liquid Glue, adhere your vellum to a piece of Basic Black cardstock, measuring 9.8cm x 14.2cm, placing your adhesive behind your wreath. Any adhesive can show through vellum.
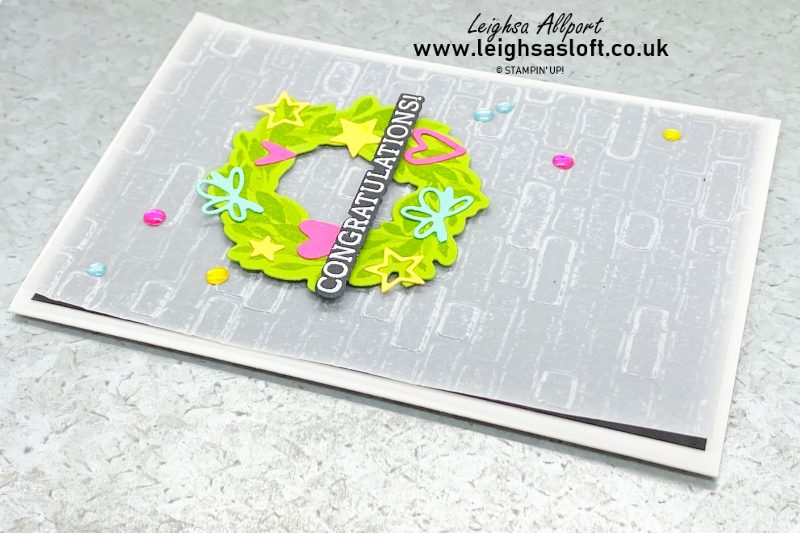
Using the Charming Sentiments bundle, stamp your sentiment on Basic Black cardstock, using Versamark ink. Cover with white Embossing Powder, shake off excess and heat until melted. Die-cut with coordinating die and attach to your wreath with Stampin’ Dimensionals. Using the smaller accent heart, star and bow dies, die-cut several of each from Daffodil Delight, Coastal Cabana and Melon Mambo cardstock. Adhere these flat onto your wreath, tucking some behind your sentiment.
Finishing Touches
Create an A6 card base, measuring 10.5cm x 14.9cm, using Thick Basic White cardstock. Adhere your Basic Black layer to the front, using Multi-Purpose Glue. To finish your card, add several Glossy Dots Assortment.
I do hope I have inspired you to get creative. All products used are listed below and available in my online shop.
Happy Crafting

- JOINING OFFER– Stampin’ Up! Starter Kit, choose 175€ I £130 worth of product for only 129€ I £99! You will also receive a free business supplies pack and free shipping on your Starter Kit—not to mention all the fun that comes with being part of Stampin’ Up! Plus, enjoy discount on future purchases, and have lots of fun with new friends.
- Grab a bargain at the LAST CHANCE PRODUCTS – Up to 60% off normal prices, while stocks last.
- Visit my ONLINE STAMPIN’ UP! SHOP to browse all the various products on offer, including Online Exclusives and Kits Collection.
- Why not follow me on Facebook for lots of crafty inspiration and weekly lives – Leighsa’s Loft.
