Happy New Year and welcome to the Stamptastic Friends January Blog Hop! This month we are all about Thanks and Gratitude. We can all name a reason that we can send a card to say Thank You or to show our gratitude. This is one thing I fail at often, and this year I am going to improve on this massively.
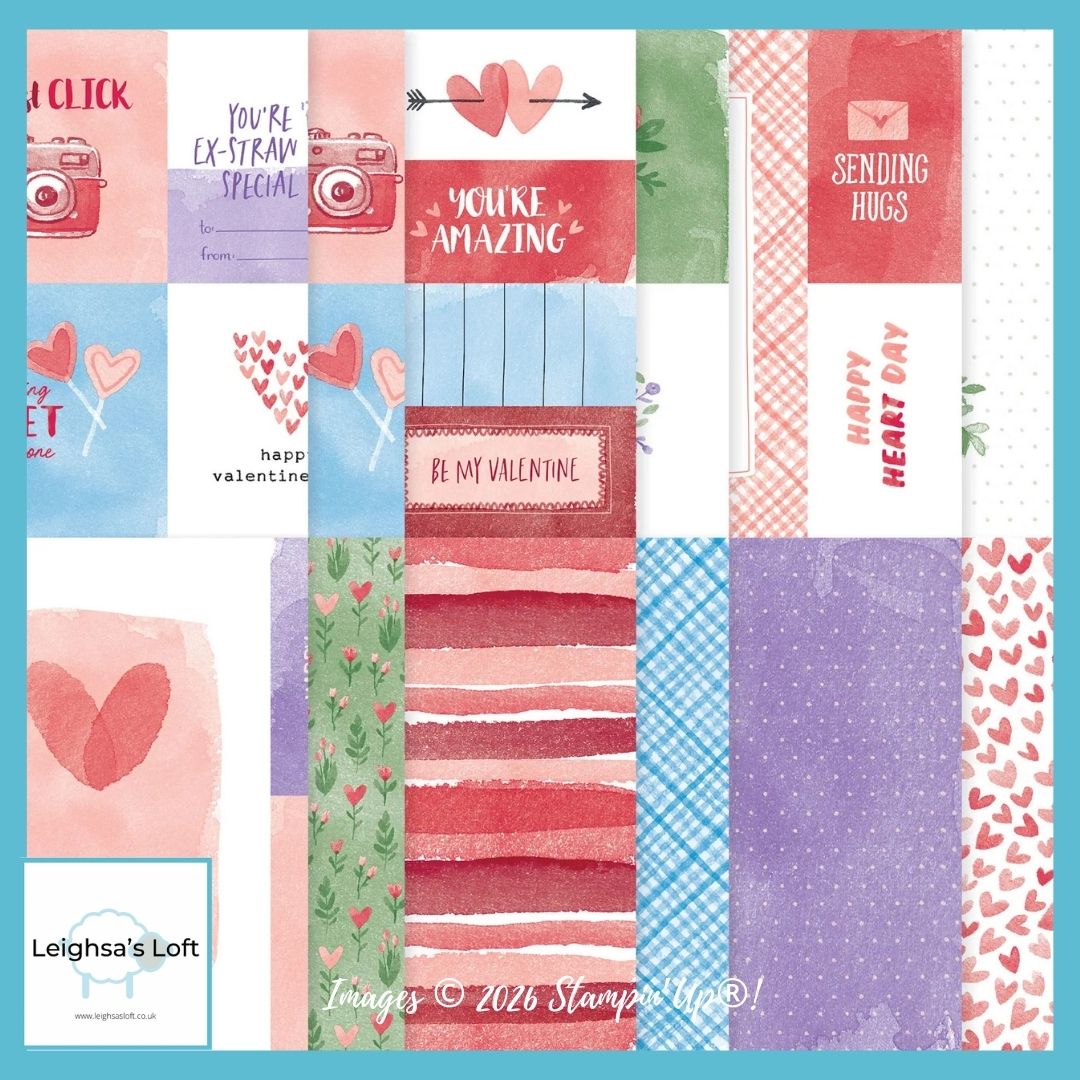
On my social media, you may have seen that I am using the Love Notes 6×6 DSP as my product spotlight for this month, and I wanted this project to keep with that. I also wanted to use the papers differently, so I have paired it with the Swirled Designs Bundle and chose Lemon Lime Twist & Balmy Blue to pair with the Azure Afternoon DSP.
How to create an Emboss Resist background
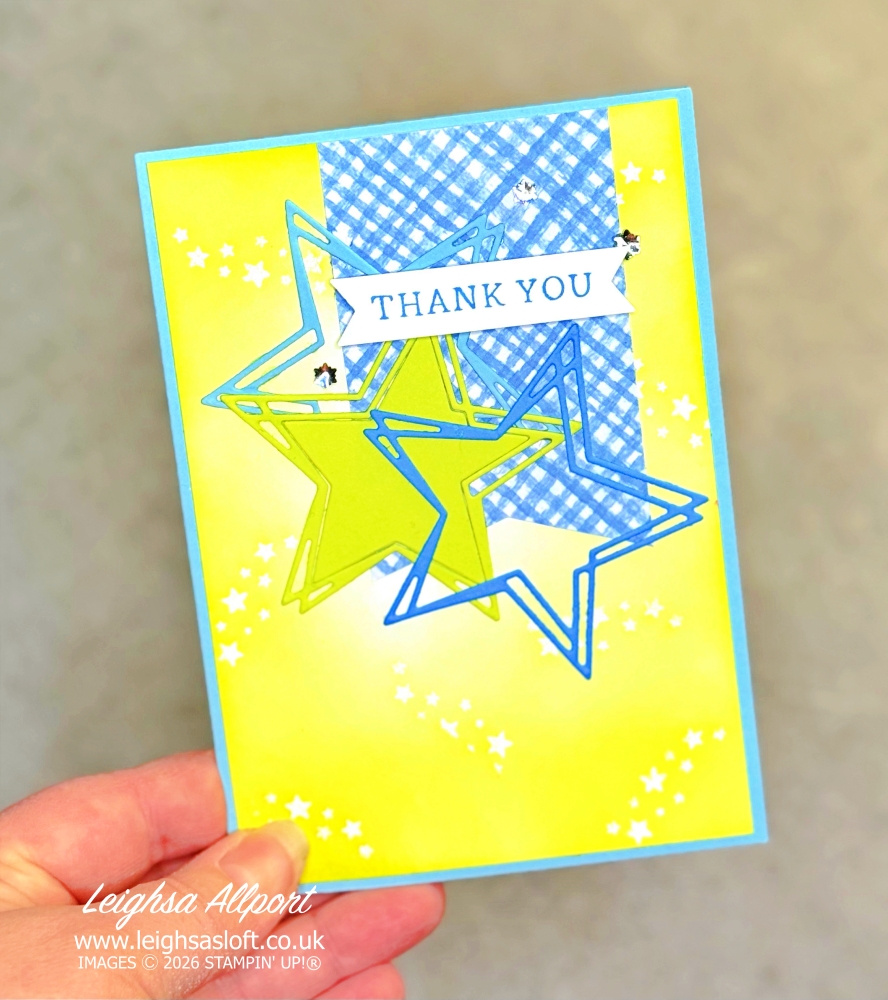
Cut a layer of Basic White cardstock measuring 10cm x 14.4cm. Rub over with an Embossing Buddy, this will remove any static or grease and stop your embossing powder sticking where you don’t want it. Using Versamark ink, randomly stamp the star cluster image over your layer. Sprinkle all over with white embossing powder and shake off excess. Use a heat tool to melt all the embossing powder.
Once your embossing is cooled and set, use a blending brush and Lemon Lime Twist ink and add colour over your layer. Start from the edges and move into the centre, turning your layer as you go. Keep going until you are happy with the coverage, I kept mine very soft towards the centre. When happy, use a tissue or soft cloth to remove ink from your embossed images. This is the ’emboss resist’ technique complete.
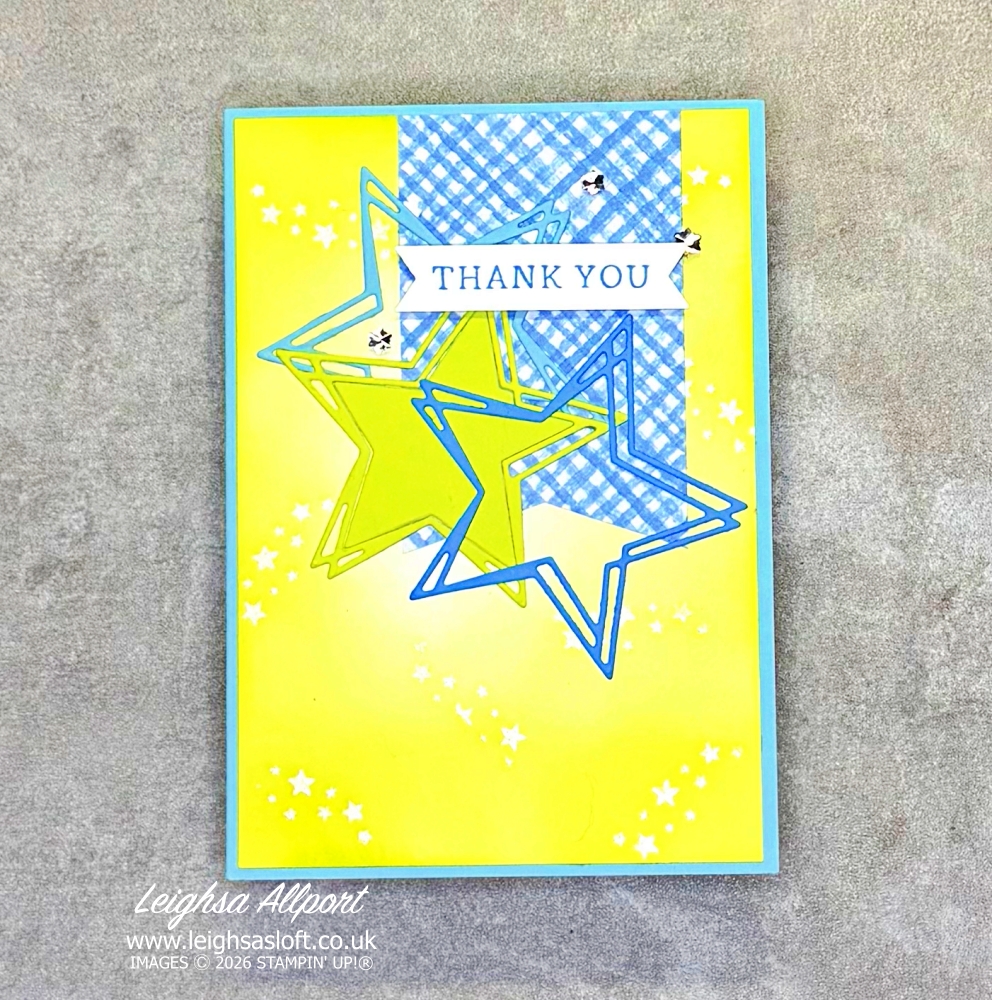
Trim a piece of Azure Afternoon DSP to 5.5cm x 8.5cm and cut to a pennant at one end. Adhere to the top right of your layer. Create an A6 card base, measuring 10.5cm x 14.9cm, using Balmy Blue cardstock. Adhere your layer to your card base.
Die-cut three large stars from Azure Afternoon, Balmy Blue, and Lemon Lime Twist cardstock. Layer these onto your card front and adhere into place. I added the centre cut-out to my Lemon Lime Twist star, this allowed it to standout better and gave a better base for my other star.

Stamp your sentiment using Azure Afternoon ink onto Basic White cardstock. Punch, die-cut or trim to size and add to your card using Dimensionals. I have used ‘Thank You’ from Simply Said stamp set and punched out using the Three Banner Punch. Finish your card with several silver Faceted Snowflakes.
I hope I have inspired you to get creative and try the Emboss Resist technique. All the products used are listed below and available to purchase from my online store.
Please do continue to hop round for lots more creativity and inspiration. I can’t wait to see what the other demonstrators have chosen to share with you.
Happy Crafting

FREE Tutorial Bundle with ALL orders
When shopping online, receive a free tutorial for 6 cards!
Learn more.
- JOINING OFFER-Stampin’ Up! Starter Kit, choose 175€ I £130 worth of product for only 129€ I £99! You will also receive a free business supplies pack and free shipping on your Starter Kit—not to mention all the fun that comes with being part of Stampin’ Up! Plus, enjoy discount on future purchases, and have lots of fun with new friends.
- Grab a bargain at the LAST CHANCE PRODUCTS – Up to 60% off normal prices, while stocks last.
- Visit my ONLINE STAMPIN’ UP! SHOP to browse all the various products on offer, including Online Exclusives and Kits Collection.
- Why not follow me on Facebook for lots of crafty inspiration and weekly lives – Leighsa’s Loft.
![Swirled Designs Bundle (English) [ 167311 ]](https://assets1.tamsnetwork.com/images/EC042017NF/167311s.jpg "Swirled Designs Bundle (English) [ 167311 ]") | ![Three Banner Punch [ 167050 ]](https://assets1.tamsnetwork.com/images/EC042017NF/167050s.jpg "Three Banner Punch [ 167050 ]") | ![Faceted Snowflakes [ 166077 ]](https://assets1.tamsnetwork.com/images/EC042017NF/166077s.jpg "Faceted Snowflakes [ 166077 ]") | ||
![Versamark Pad [ 102283 ]](https://assets1.tamsnetwork.com/images/EC042017NF/102283s.jpg "Versamark Pad [ 102283 ]") | ![Basic White A4 Cardstock [ 166781 ]](https://assets1.tamsnetwork.com/images/EC042017NF/166781s.jpg "Basic White A4 Cardstock [ 166781 ]") | ![Azure Afternoon A4 Cardstock [ 161728 ]](https://assets1.tamsnetwork.com/images/EC042017NF/161728s.jpg "Azure Afternoon A4 Cardstock [ 161728 ]") | ![Balmy Blue A4 Cardstock [ 147007 ]](https://assets1.tamsnetwork.com/images/EC042017NF/147007s.jpg "Balmy Blue A4 Cardstock [ 147007 ]") | |
![Lemon Lime Twist A4 Cardstock [ 144250 ]](https://assets1.tamsnetwork.com/images/EC042017NF/144250s.jpg "Lemon Lime Twist A4 Cardstock [ 144250 ]") | ![Basics Wow! Embossing Powder [ 165679 ]](https://assets1.tamsnetwork.com/images/EC042017NF/165679s.jpg "Basics Wow! Embossing Powder [ 165679 ]") | ![Embossing Additions Tool Kit [ 159971 ]](https://assets1.tamsnetwork.com/images/EC042017NF/159971s.jpg "Embossing Additions Tool Kit [ 159971 ]") | ![Heat Tool - Uk Plug [ 129054 ]](https://assets1.tamsnetwork.com/images/EC042017NF/129054s.jpg "Heat Tool - Uk Plug [ 129054 ]") | ![Blending Brushes [ 153611 ]](https://assets1.tamsnetwork.com/images/EC042017NF/153611s.jpg "Blending Brushes [ 153611 ]") |
![Paper Trimmer [ 152392 ]](https://assets1.tamsnetwork.com/images/EC042017NF/152392s.jpg "Paper Trimmer [ 152392 ]") | ![Multipurpose Liquid Glue [ 154974 ]](https://assets1.tamsnetwork.com/images/EC042017NF/154974s.jpg "Multipurpose Liquid Glue [ 154974 ]") | ![Stampin' Dimensionals [ 104430 ]](https://assets1.tamsnetwork.com/images/EC042017NF/104430s.jpg "Stampin' Dimensionals [ 104430 ]") | ![Mini Stampin' Cut & Emboss Machine [ 150673 ]](https://assets1.tamsnetwork.com/images/EC042017NF/150673s.jpg "Mini Stampin' Cut & Emboss Machine [ 150673 ]") |
![Love Notes 6" X 6" (15.2 X 15.2 Cm) Mix & Match Designer Series Paper [ 166985 ]](https://assets1.tamsnetwork.com/images/EC042017NF/166985s.jpg "Love Notes 6\" X 6\" (15.2 X 15.2 Cm) Mix & Match Designer Series Paper [ 166985 ]")
![Simply Said Mix & Match Photopolymer Stamp Set (English) [ 163756 ]](https://assets1.tamsnetwork.com/images/EC042017NF/163756s.jpg "Simply Said Mix & Match Photopolymer Stamp Set (English) [ 163756 ]")
![Azure Afternoon Classic Stampin' Pad [ 161663 ]](https://assets1.tamsnetwork.com/images/EC042017NF/161663s.jpg "Azure Afternoon Classic Stampin' Pad [ 161663 ]")


Gorgeous thank you card Leighsa and you’ve used the Swirled Desgns dies which are one of my current favourites !