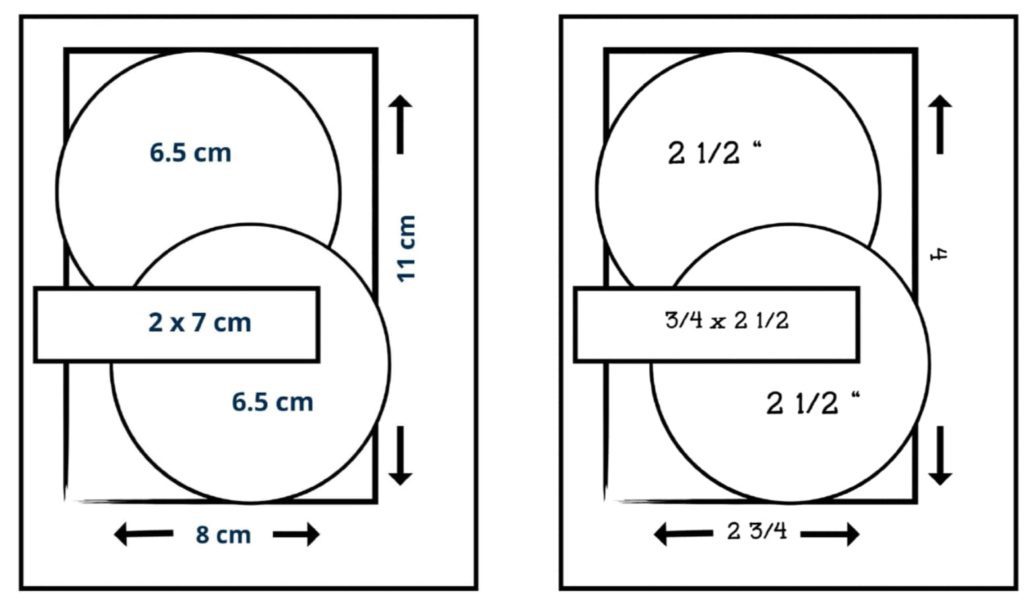
Hello and welcome to the June Stamptastic Friends Blog Hop. This month we have a card sketch challenge. You can use a card sketch as precisely or loosely as you wish, following every detail or turning the idea on its head. Our card sketch has measurements and for that reason I have chosen to follow as closely as I can, with the supplies I have.
I do enjoy a card sketch challenge and love to see everyone’s interpretation. Just by changing a shape or using different colours or supplies, makes such a difference to the end product. This card sketch was given to us by Cheryl – Stampin’ n Crafting with Cheryldiana and she has given us metric and imperial measurements. All my measurements are metric.
Creating a Card with a Card Sketch
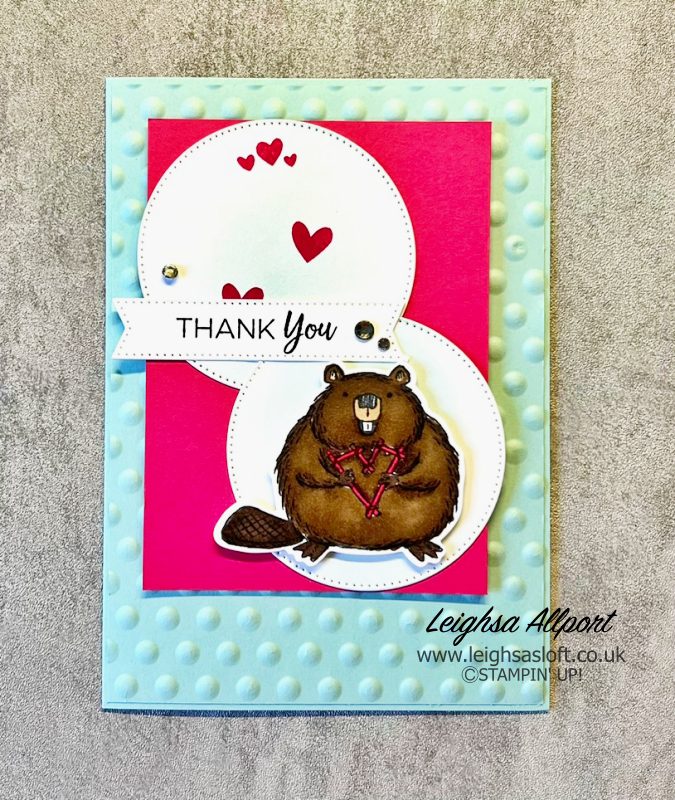
Trim a piece of Pool Party cardstock to 10.2cm x 14.6cm and dry emboss, using the Dots embossing folder from the Basics 3D Embossing Folders. Adhere this to an A6 Pool Party cardbase, measuring 10.5cm x 14.9cm.
Cut a Melon Mambo mat layer, measuring 8cm x 11cm, and adhere to your embossed layer using Stampin’ Dimensionals.
Using the second largest circle from the Stylish Shapes Dies, cut two circles from Basic White cardstock. Add a light shadow of Pool Party ink with a Blending Brush. Stamp several hearts on one circle, using Melon Mambo ink and I used the hearts from the Bee My Valentine stamp set. Adhere your circles to your Melon Mambo layer using Multipurpose Liquid Glue.
Stamp and die cut the Beaver image, from the Fluffiest Friends Bundle, using Memento Tuxedo Black ink onto Basic White cardstock. Colour your image using Stampin’ Blends, I have used Melon Mambo Dark, Peacan Pie Light and 100 & 300 from the naturals. Using Stampin’ Dimensionals, adhere to your lower circle.
For the sentiment I have used ‘Thank you’ from the Throughout The Year stamp set and stamped onto Basic White cardstock with Memento Tuxedo Black ink. Diecut using the longer, narrow banner from the Styish Shapes Dies. Add to your card front with Multipurpose Liquid Glue.
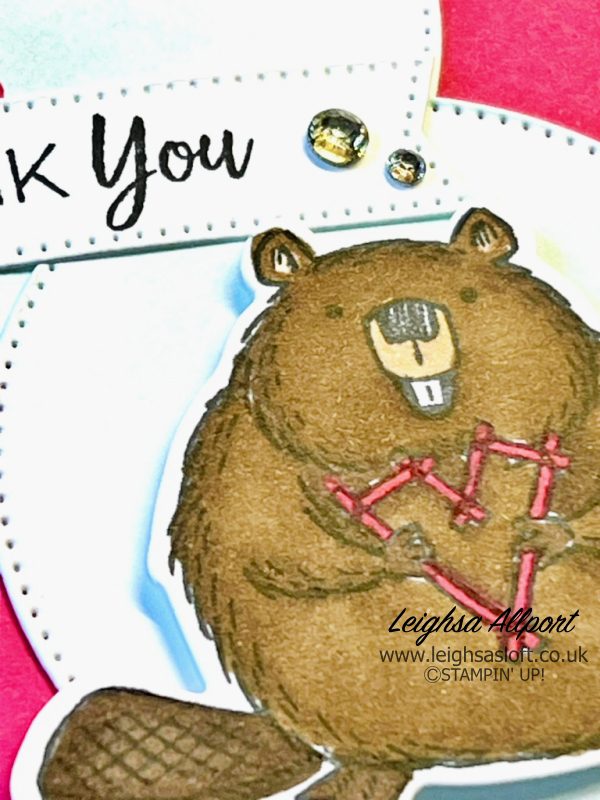
To finish your card, add several Rhinestone Basic Jewels.
I hope I have inspired you to get creative and have a go at using a card sketch. All products used are listed below and available to purchase from my online shop.
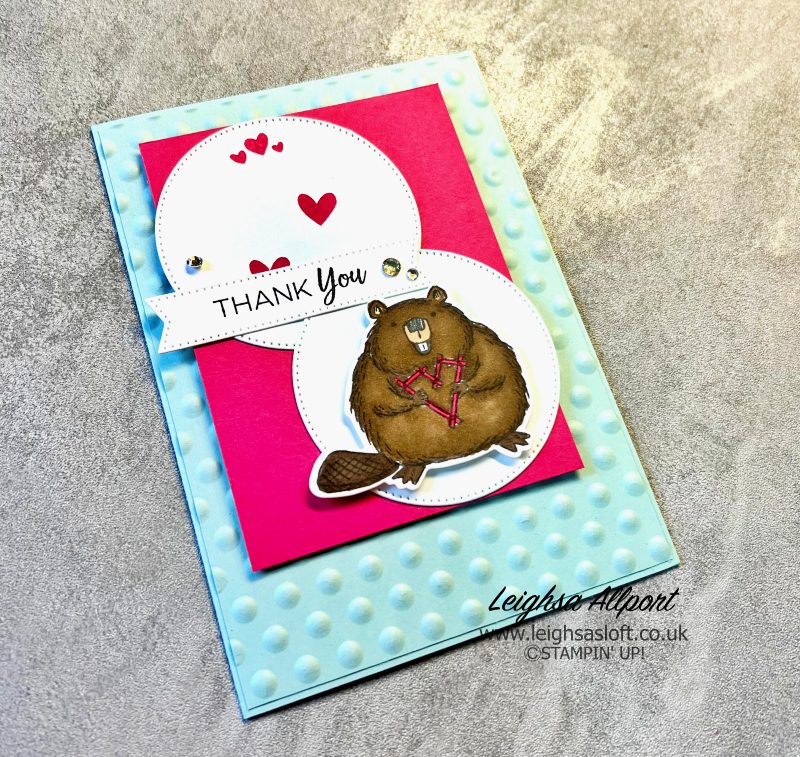
Alternative Card Using The Card Sketch
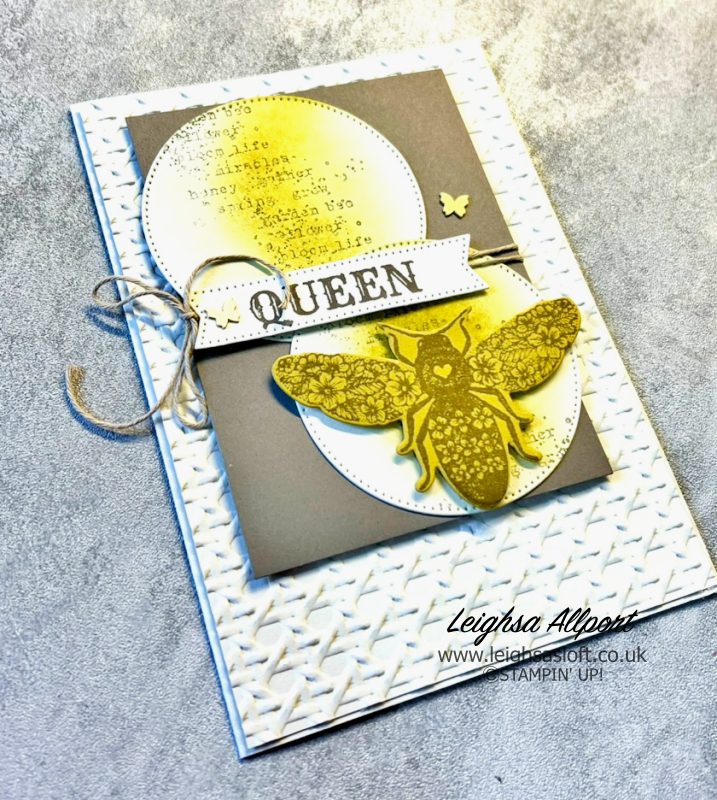
Please do continue to hop round for lots more creativity and inspiration.
Happy Crafting
FREE Tutorial Bundle with ALL orders
When shopping online, receive a free tutorial for 8 cards!
Learn more.
- JOINING OFFER– Stampin’ Up! Starter Kit, choose 175€ I £130 worth of product for only 129€ I £99! You will also receive a free business supplies pack and free shipping on your Starter Kit—not to mention all the fun that comes with being part of Stampin’ Up! Plus, enjoy discount on future purchases, and have lots of fun with new friends.
- Grab a bargain at the LAST CHANCE PRODUCTS – Up to 60% off normal prices, while stocks last.
- Visit my ONLINE STAMPIN’ UP! SHOP to browse all the various products on offer, including Online Exclusives and Kits Collection.
- Why not follow me on Facebook for lots of crafty inspiration and weekly lives – Leighsa’s Loft.





I love both of your cards especially the beaver one. (I used to be a Beaver Scout Leader). I have the Furriest Friends bundle but have not used it yet.