
Hello and welcome to Junes Tech 4 Stampers blog hop. Wow! Here in the UK, we are having beautiful weather and I have been making the most of it. My garden is in full bloom and looking very pretty. This month’s theme is Embossing, and I would like to share with you just two of the ways you can add embossing to your project.
I will be using an embossing folder, also known as dry embossing, to add background texture and heat embossing stamp an image and sentiment.
Embossing your card
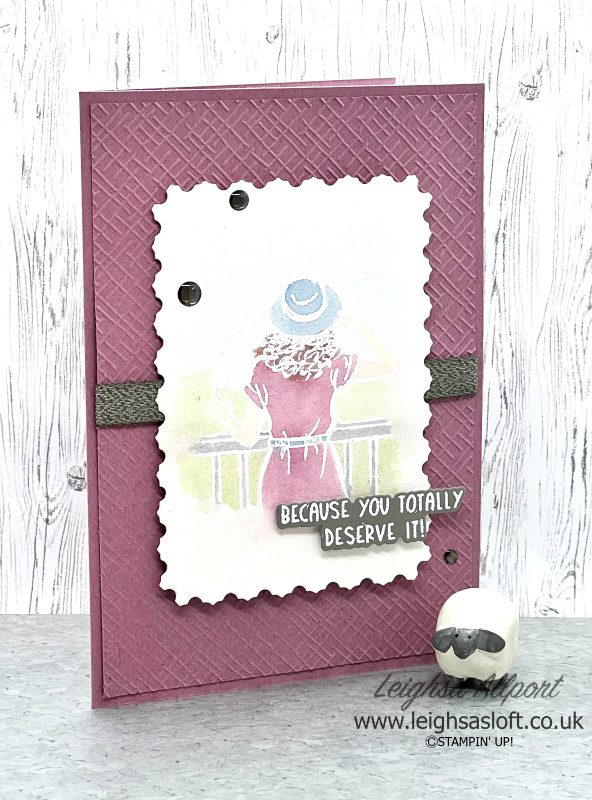
Create an A6 card base, measuring 10.5cm x 14.9cm, and a layer, measuring 10cm x 14.4cm, from Moody Mauve cardstock. Place your layer into your embossing folder and run through your Stampin’ Cut & Emboss Machine, using the corresponding plates. I have used the crosshatch folder from the Basics 3D Embossing Folders, these are available as part of our Online Exclusives.
Wrap a length of Pebbled Path Textured Ribbon around your layer and adhere into place on the rear. Using Multipurpose Liquid Glue, adhere your layer to your card base.
Take a piece of Fluid 100 Watercolor Paper and rub over with an Embossing Buddy, these are available as part of the Embossing Additions Tool Kit, this will rid any static and stop your embossing powder sticking where it is not wanted. Stamp your image using Versamark ink and sprinkle with white embossing powder from the Stampin’ Emboss Powders Basics. Shake off the excess and return to the pot.
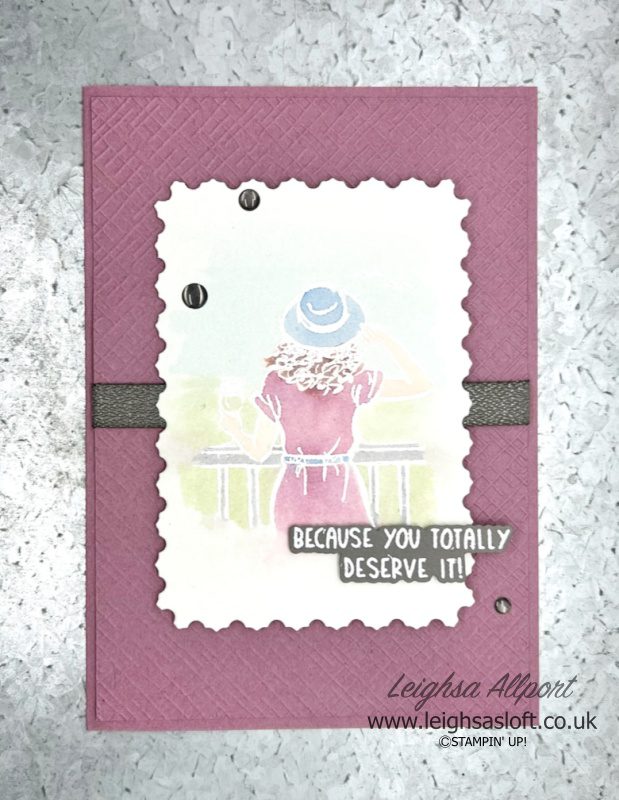
Heat with a Heat Tool and watch the magic happen. I never tire of this process. Ensure all the powder is melted. Repeat the process with your sentiment, onto Pebbled Path cardstock. I have used the Charming Sentiments stamp set and dies.
Colour your image using Water Painters and Moody Mauve, Boho Blue, Pebbled Path, Early Espresso, Petal Pink, Old Olive and Pool Party ink. Allow to dry before die cutting. I used the largest frame from the Darling Details Dies, to give a different edge. Add to your card front using Stampin’ Dimensions.
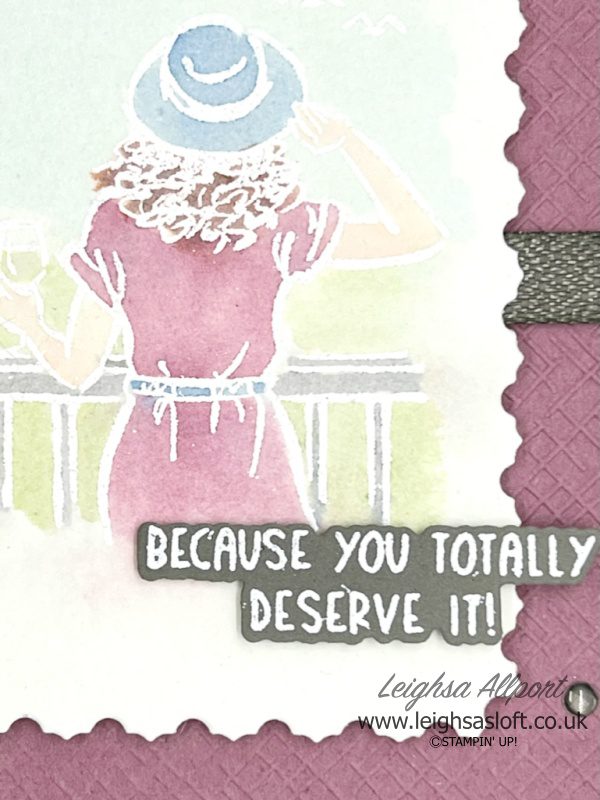
Finish by adding your sentiment and several Pebbled Path 2023-2025 In Color Dots.
I do hope you have found some inspiration with me. All products used are listed below and available to purchase from my online shop.
You can watch me recreate this card and another using the In The Moment stamp set, here.
Please do continue to hop round for lots more inspiration.
Happy Crafting

PLEASE NOTE – The Product List links may nolonger direct you to the correct place, this is due to a change in my Demonstratorship. If you wish to purchase or take a closer look, please use the Shop Button below.

FREE Tutorial Bundle with ALL Online Orders from my Stampin’ Up!® Shop!
Learn more.
- JOINING OFFER– Stampin’ Up! Starter Kit, pay £95 and receive a £125 coupon code to spend on your favourite products! PLUS, you will also receive a Get Started Bundle —not to mention all the fun that comes with being part of Stampin’ Up! Plus, enjoy discount on future purchases, and have lots of fun with new friends.
- Grab a bargain at the LAST CHANCE PRODUCTS – Up to 60% off normal prices, while stocks last.
- Visit my ONLINE STAMPIN’ UP! SHOP to browse all the various products on offer, including Online Exclusives and Kits Collection.
- Why not follow me on Facebook for lots of crafty inspiration and weekly lives – Leighsa’s Loft.
 |  |  | ||
 |  |  |  | |
 |  | |||
 |  |  | ||
 |  |  |  |  |
")
")
 Textured Ribbon")


Lovely card Leighsa – I think we all love that embossing folder. I love the soft focus watercolour main image too – I too never tire of watching embossing magic!
Love your combination of embossing techniques, lovely card – tfs Leighsa