
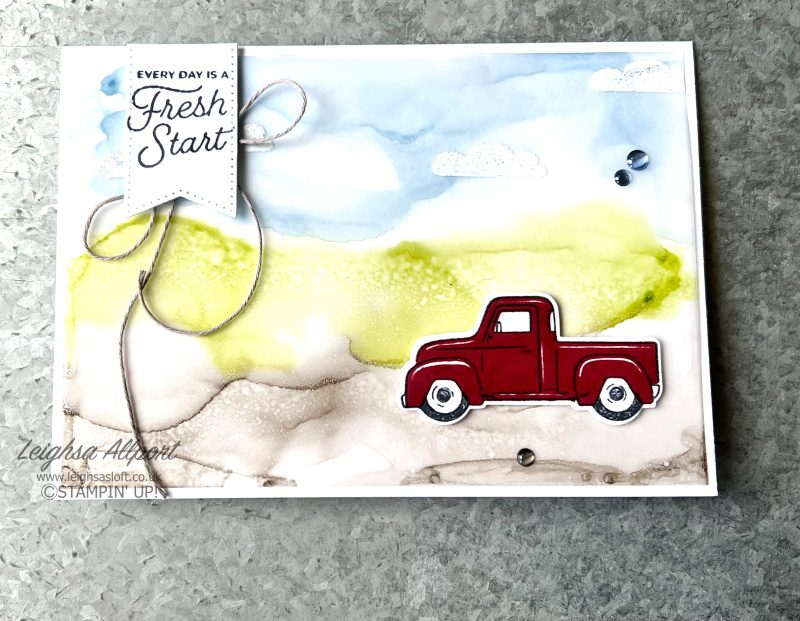
Hello and welcome to Augusts Tech 4 Stampers blog hop. So, here in the UK we have had the wettest weather I can ever remember. The garden is growing at a supersonic speed, and I can’t keep up. This month’s theme is Vellum, and I would like to share with you a different I have recently discovered to create Vellum Background using Stampin’ Bends and Alcohol.
I recently participated in a product spotlight for our Team Meeting and was given the Pebbled Path Stampin’ Blends Combo and tasked with showcasing these. I showed several separate ways to use them including this one I am sharing with you today. Using the Trucking Along Bundle for this project I wanted to create an effect of road, grass and sky.
Creating your card
Cut a piece of Vellum measuring 14.4cm x 10cm. Using Pebbled Path Dark Stampin’ Blend, add colour to the bottom third of your Vellum. Spritz with Isopropanol/Alcohol 99.99%. This will cause the colour to move. Use your heat tool to move the colour and evaporate the alcohol. If you want, you can add more colour or alcohol as needed. Once dry you can repeat the process using Granny Apple Green Dark Stampin’ Blend, over the middle third. Repeat again with Boho Blue Light Stampin’ Blend, over the top third.
When your Vellum is completely dry and rub over with your Embossing Buddy to remove any static. Using Versamark ink, stamp several cloud imagesover your sky. Cover with white embossing powder, shake off excess and melt with heat tool. Make sure you do not overheat your vellum.
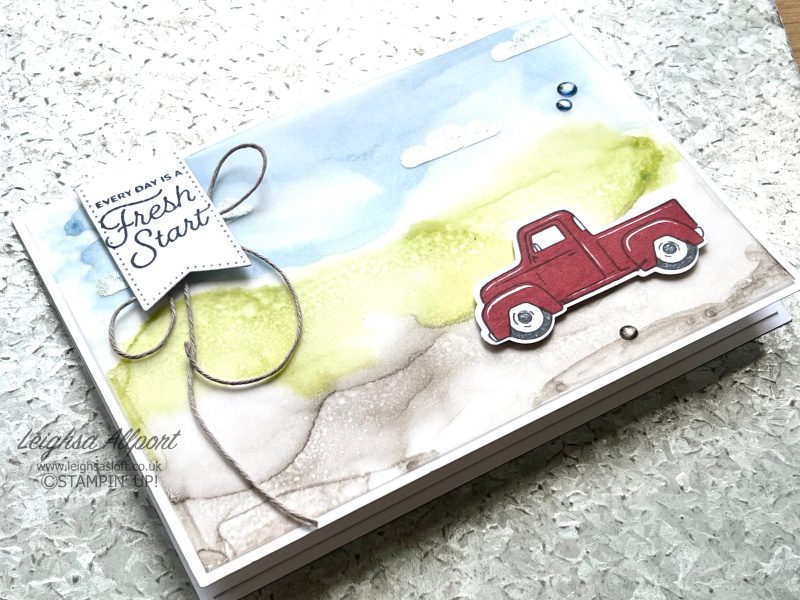
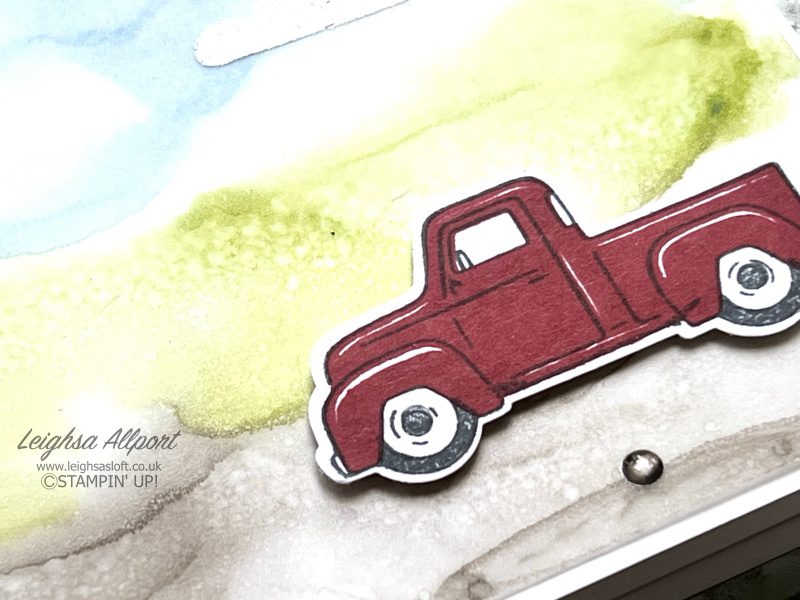
Stamp your truck image onto Basic White cardstock, using Memento Tuxedo Black ink. Stamp the wheel infill image with Memento ink and the truck infill with Cherry Cobbler. Punch out your image using the coordinating Trucking Along Builder Punch. Adhere to your Vellum Background using Stampin’ Dimensionals.
Using Memento Tuxedo Black ink, stamp your sentiment onto Basic White cardstock and die cut using the largest of the banner dies from the Stylish Shapes Dies. Adhere to your Vellum Background using Stampin’ Dimensionals. Tie a bow with Gray Granite Baker’s Twine from the Essentials Pack. Add under your sentiment with a Mini Glue Dot.
Finishing touches
Create an A6 card base, measuring 14.9cm x 10.5cm, using Thick Basic White cardstock. Adhere your Vellum Background to your card base using Multipurpose Liquid Glue, keeping it hidden where possible. Finish by adding several Pebbled Path and Boho Blue 2023-2025 In Color Dots.
I do hope you have found some inspiration with me. All products used are listed below and available to purchase from my online shop.
Please do continue to hop round for lots more inspiration.
Happy Crafting

- JOINING OFFER– Stampin’ Up! Starter Kit, pay £95 and receive a £125 coupon code to spend on your favourite products! PLUS, you will also receive a Get Started Bundle —not to mention all the fun that comes with being part of Stampin’ Up! Plus, enjoy discount on future purchases, and have lots of fun with new friends.
- Grab a bargain at the LAST CHANCE PRODUCTS – Up to 60% off normal prices, while stocks last.
- Visit my ONLINE STAMPIN’ UP! SHOP to browse all the various products on offer, including Online Exclusives and Kits Collection.
- Why not follow me on Facebook for lots of crafty inspiration and weekly lives – Leighsa’s Loft.
") |  |  |  |  |
 | ||||
 |  |  |  |  |
 |  |  |  |  |


What a fascinating technique, Leighsa – will have to give it a try, tfs.
Haven’t used alcohol techniques for ages – great card Leighsa